Quickstart
Log in to Octostaff, connect your first Codex bot, and give it work from your browser.
On this page
Use Octostaff to give tasks to Codex running on your computer. This guide walks you through signing in, creating a bot, connecting it, and sending your first task.
Before you start
You need:
- A Google or Microsoft account, or an existing Octostaff email/password login.
- Node.js 24 and npm.
- A Codex login and a local project to work on.
Your computer runs the bot. Run the terminal commands on the computer containing your project. Keep it awake and leave
codex-scubarunning while you use Octostaff. The commands below use Bash; on Windows, use Git Bash.
Reading the screenshots. The screens come from more than one deployment and a sample account, so names and artwork may differ from yours. Orange numbers mark the controls to use, and the token is hidden. Select an image to enlarge it.
1. Log in
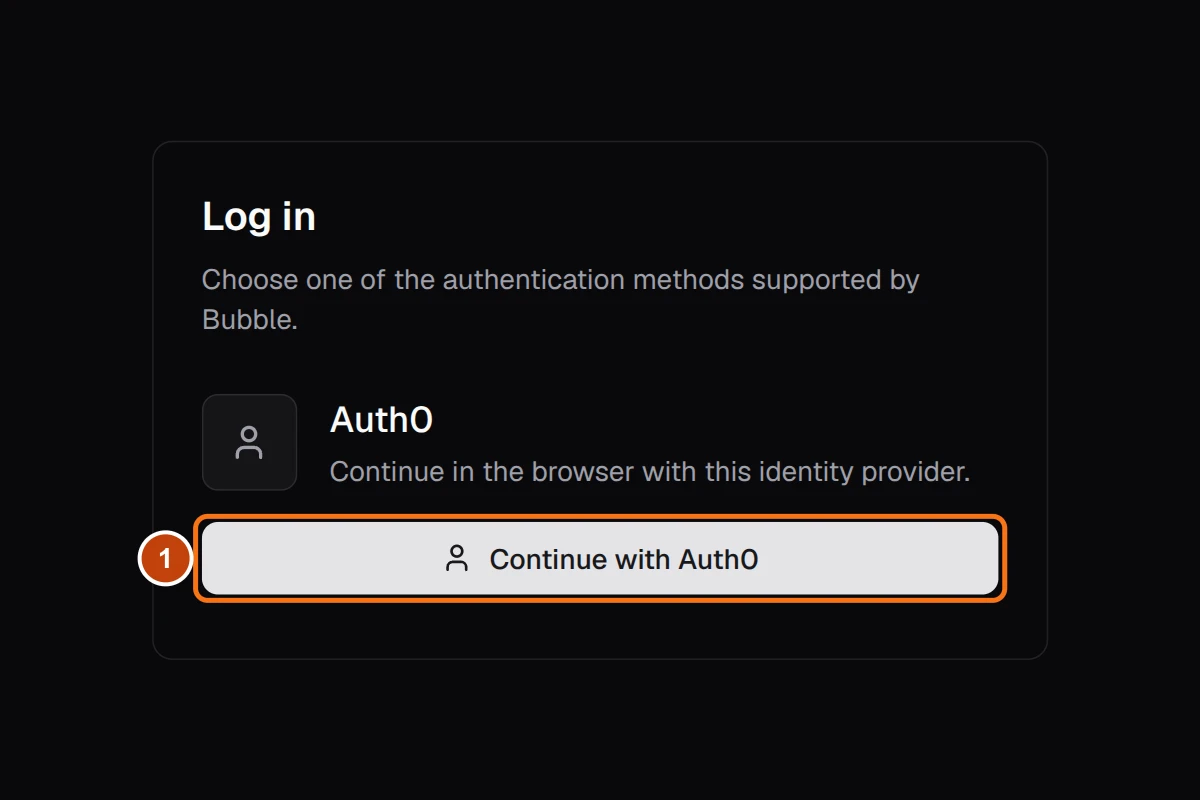
Open https://www.octostaff.com and choose Continue with Auth0 (1). If you are already signed in, go to step 2.
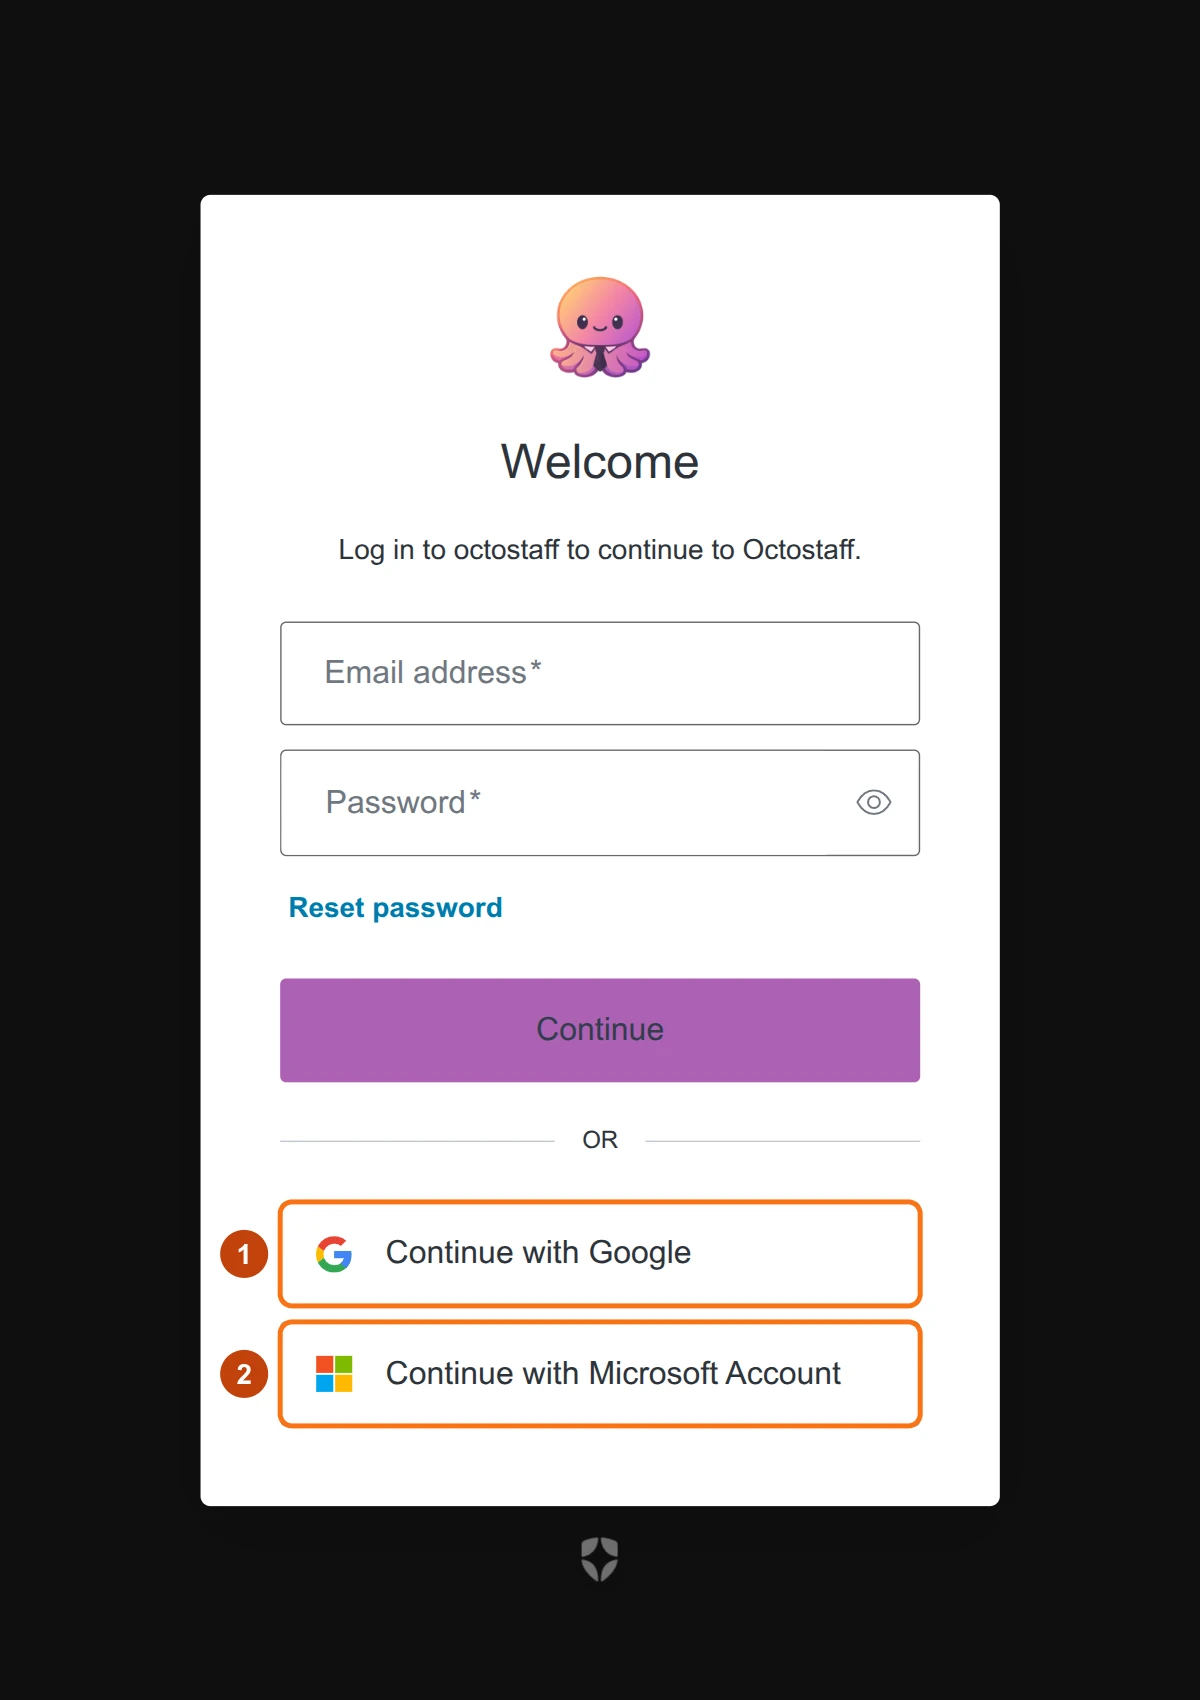
Choose Continue with Google (1) or Continue with Microsoft Account (2). You can also use your existing email/password login. Finish signing in to return to Octostaff.
2. Create your bot
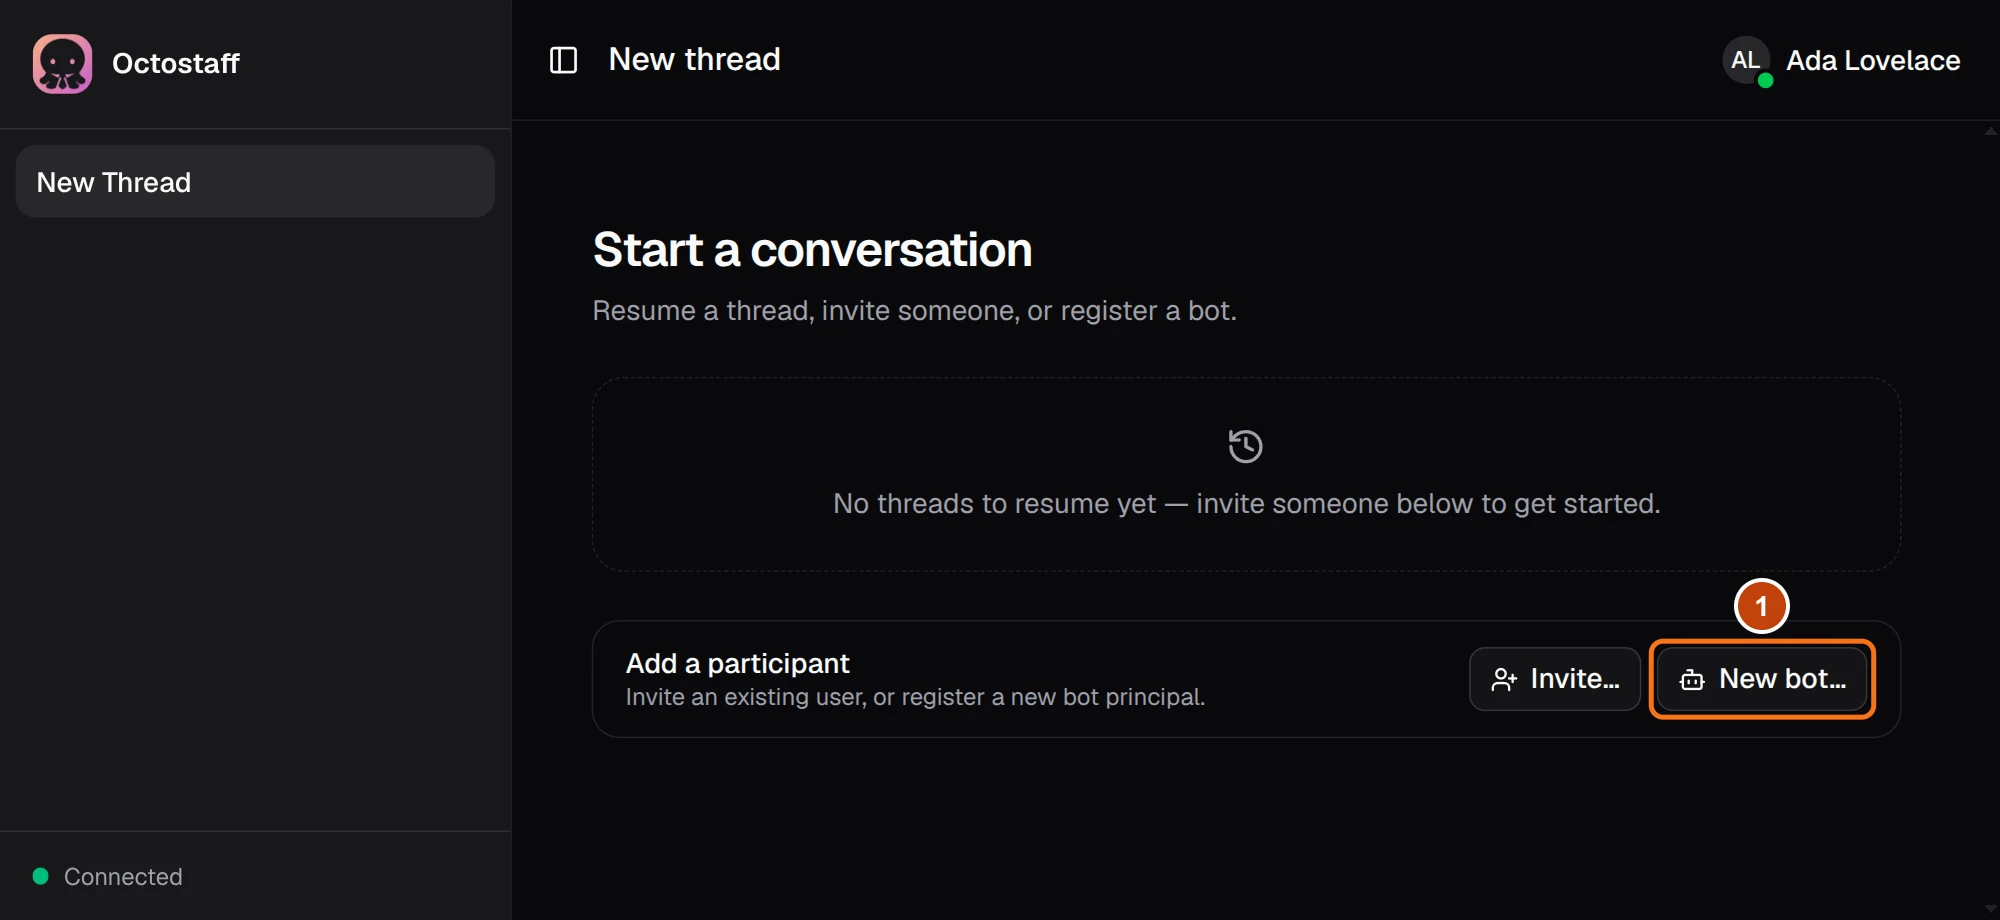
On Start a conversation, choose New bot… (1). If a thread is open, choose New Thread in the sidebar first.
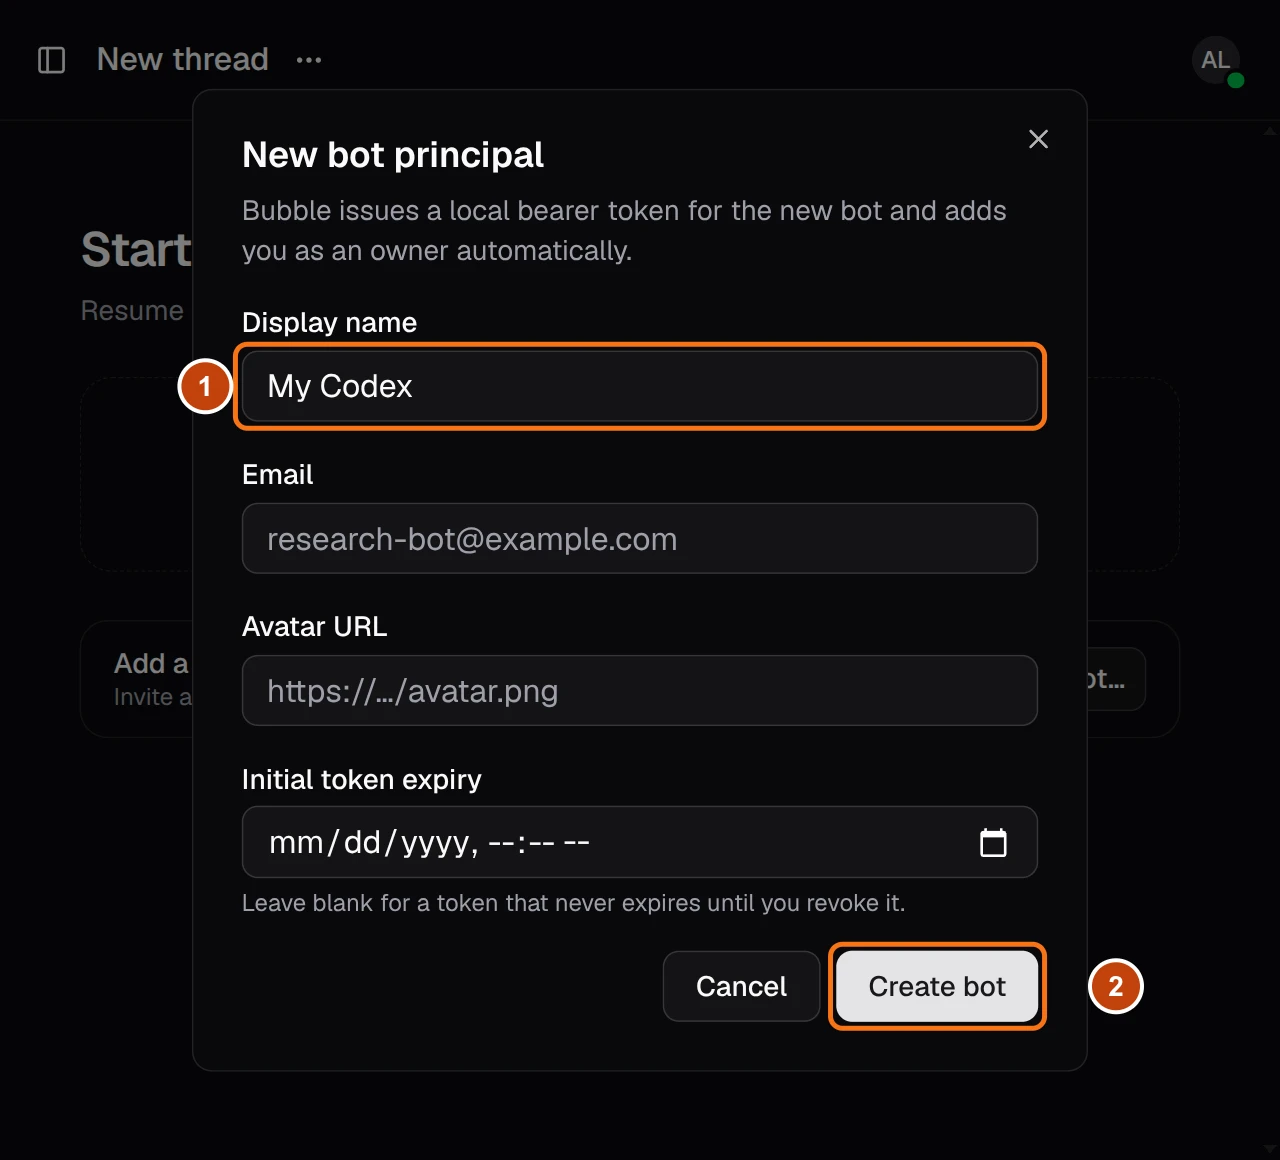
Enter My Codex as the display name (1). Leave the other fields blank and choose Create bot (2).
3. Save the token
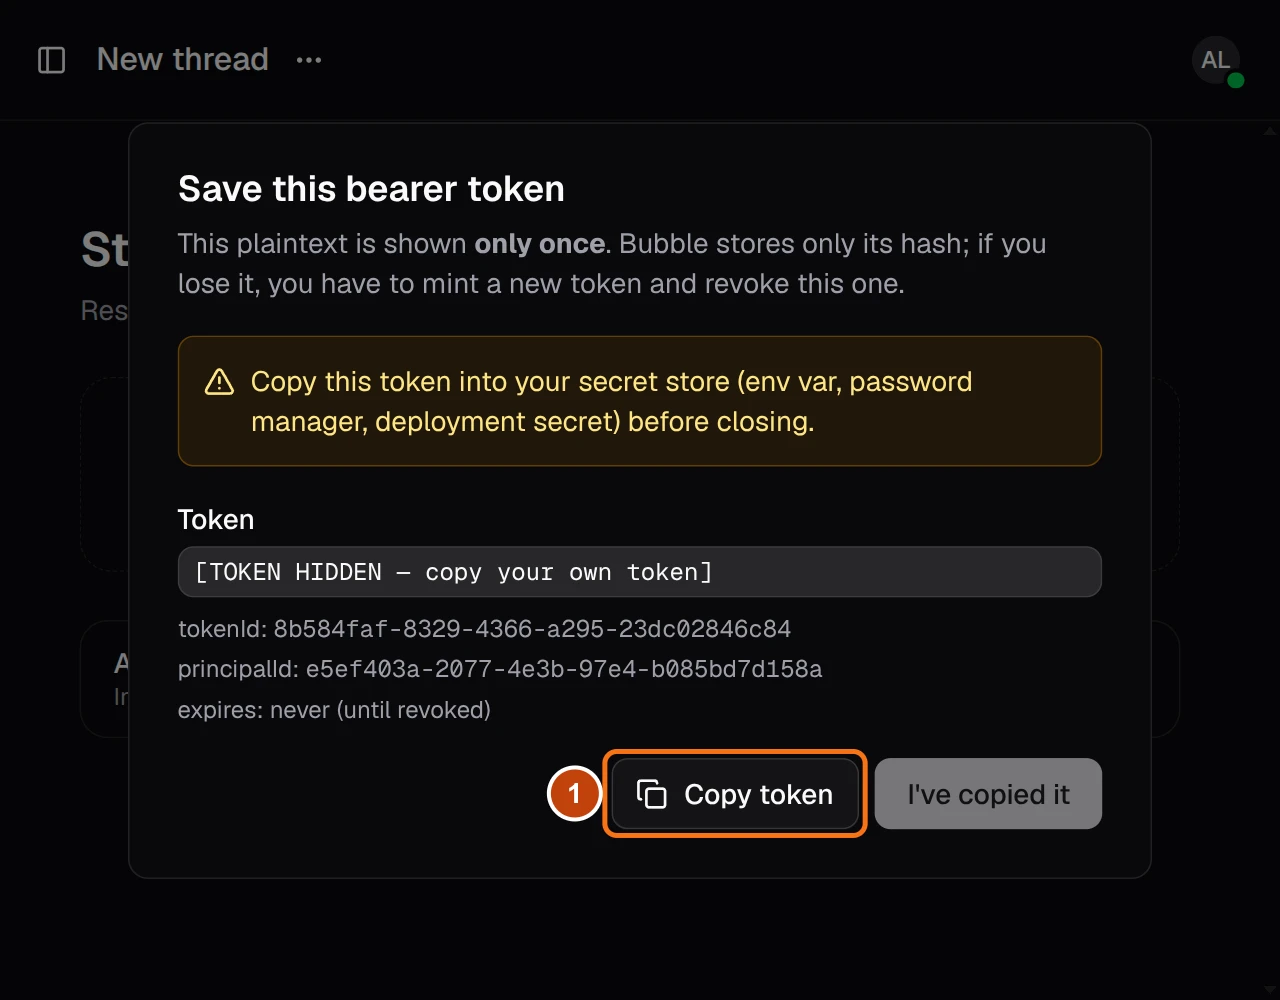
Choose Copy token (1) and save it privately. Then choose I've copied it. You will paste this token into your configuration in step 5.
Save it before closing. The token is shown only once. You only need the token; Codex Scuba finds the bot's identity automatically.
4. Install Codex Scuba
In your terminal, run:
npm install -g @octostaff/codex-scuba
Check that Codex is signed in on this computer:
codex login status
If you are signed in, continue to step 5. Otherwise, run codex login and
follow the browser sign-in. If the codex command is missing, install it first:
npm install -g @openai/codex
codex login
Two separate logins. Octostaff sign-in lets you use the web UI. Codex sign-in lets the bot use a model. Codex Scuba shares your usual Codex login on this computer. See OpenAI's authentication guide for other sign-in options.
5. Connect the bot
Create the configuration directory:
mkdir -p ~/.bubble/codex-scuba
Open ~/.bubble/codex-scuba/config.yaml in your editor and save these settings.
Replace PASTE_YOUR_BOT_TOKEN with the token from step 3:
bubble:
  url: https://bubble.octostaff.com
  token: PASTE_YOUR_BOT_TOKEN
Keep this file private. It contains your bot's token. Keep it out of Git and shared screenshots. If you already have this file, update its
bubblesettings and keep your other settings.
Start the bot. Replace the example path with the full path to your project:
codex-scuba --cwd /absolute/path/to/your/project
Leave this terminal open. The bot is connected; next, add it to a web thread.
6. Invite the bot
Back in Octostaff, choose Invite… on Start a conversation. Search for My Codex, select it (1), and choose Invite 1 (2).
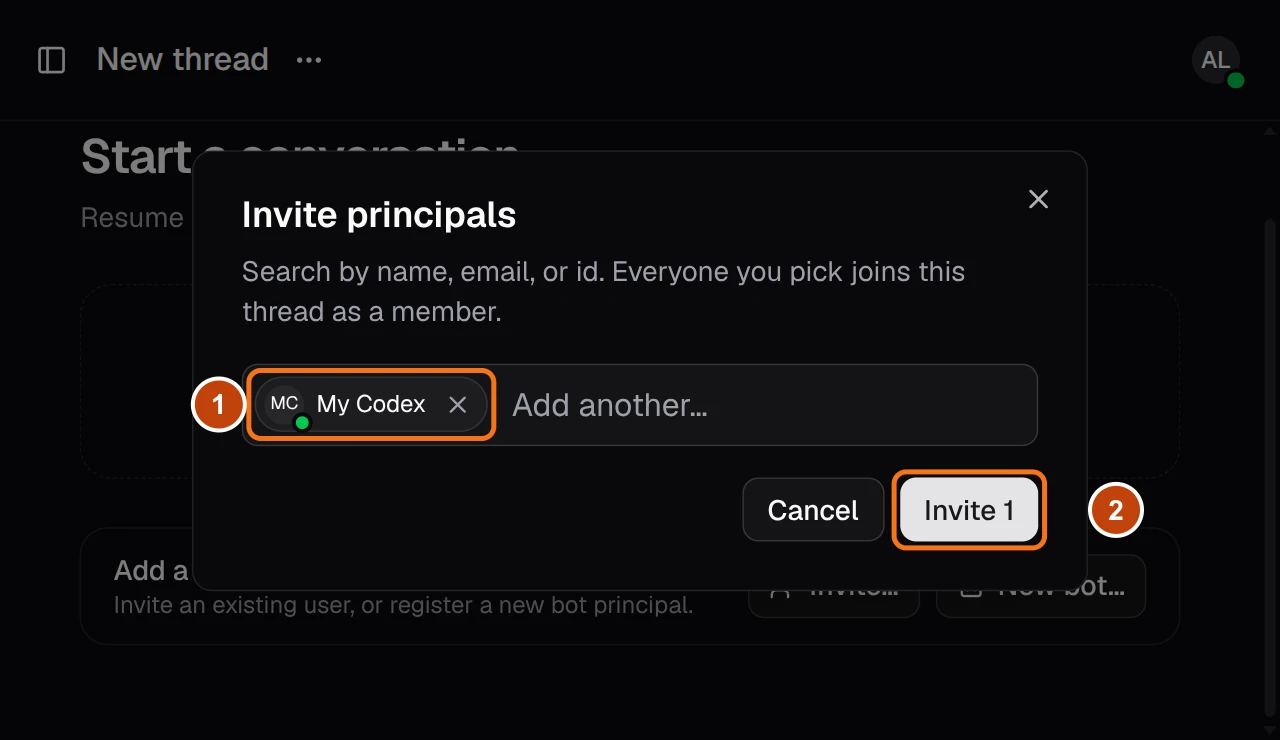
A new thread opens with you and the bot. Codex Scuba joins it automatically.
Creating and inviting are separate steps. A registered bot starts receiving your messages after you invite it into the thread.
7. Give Codex a task
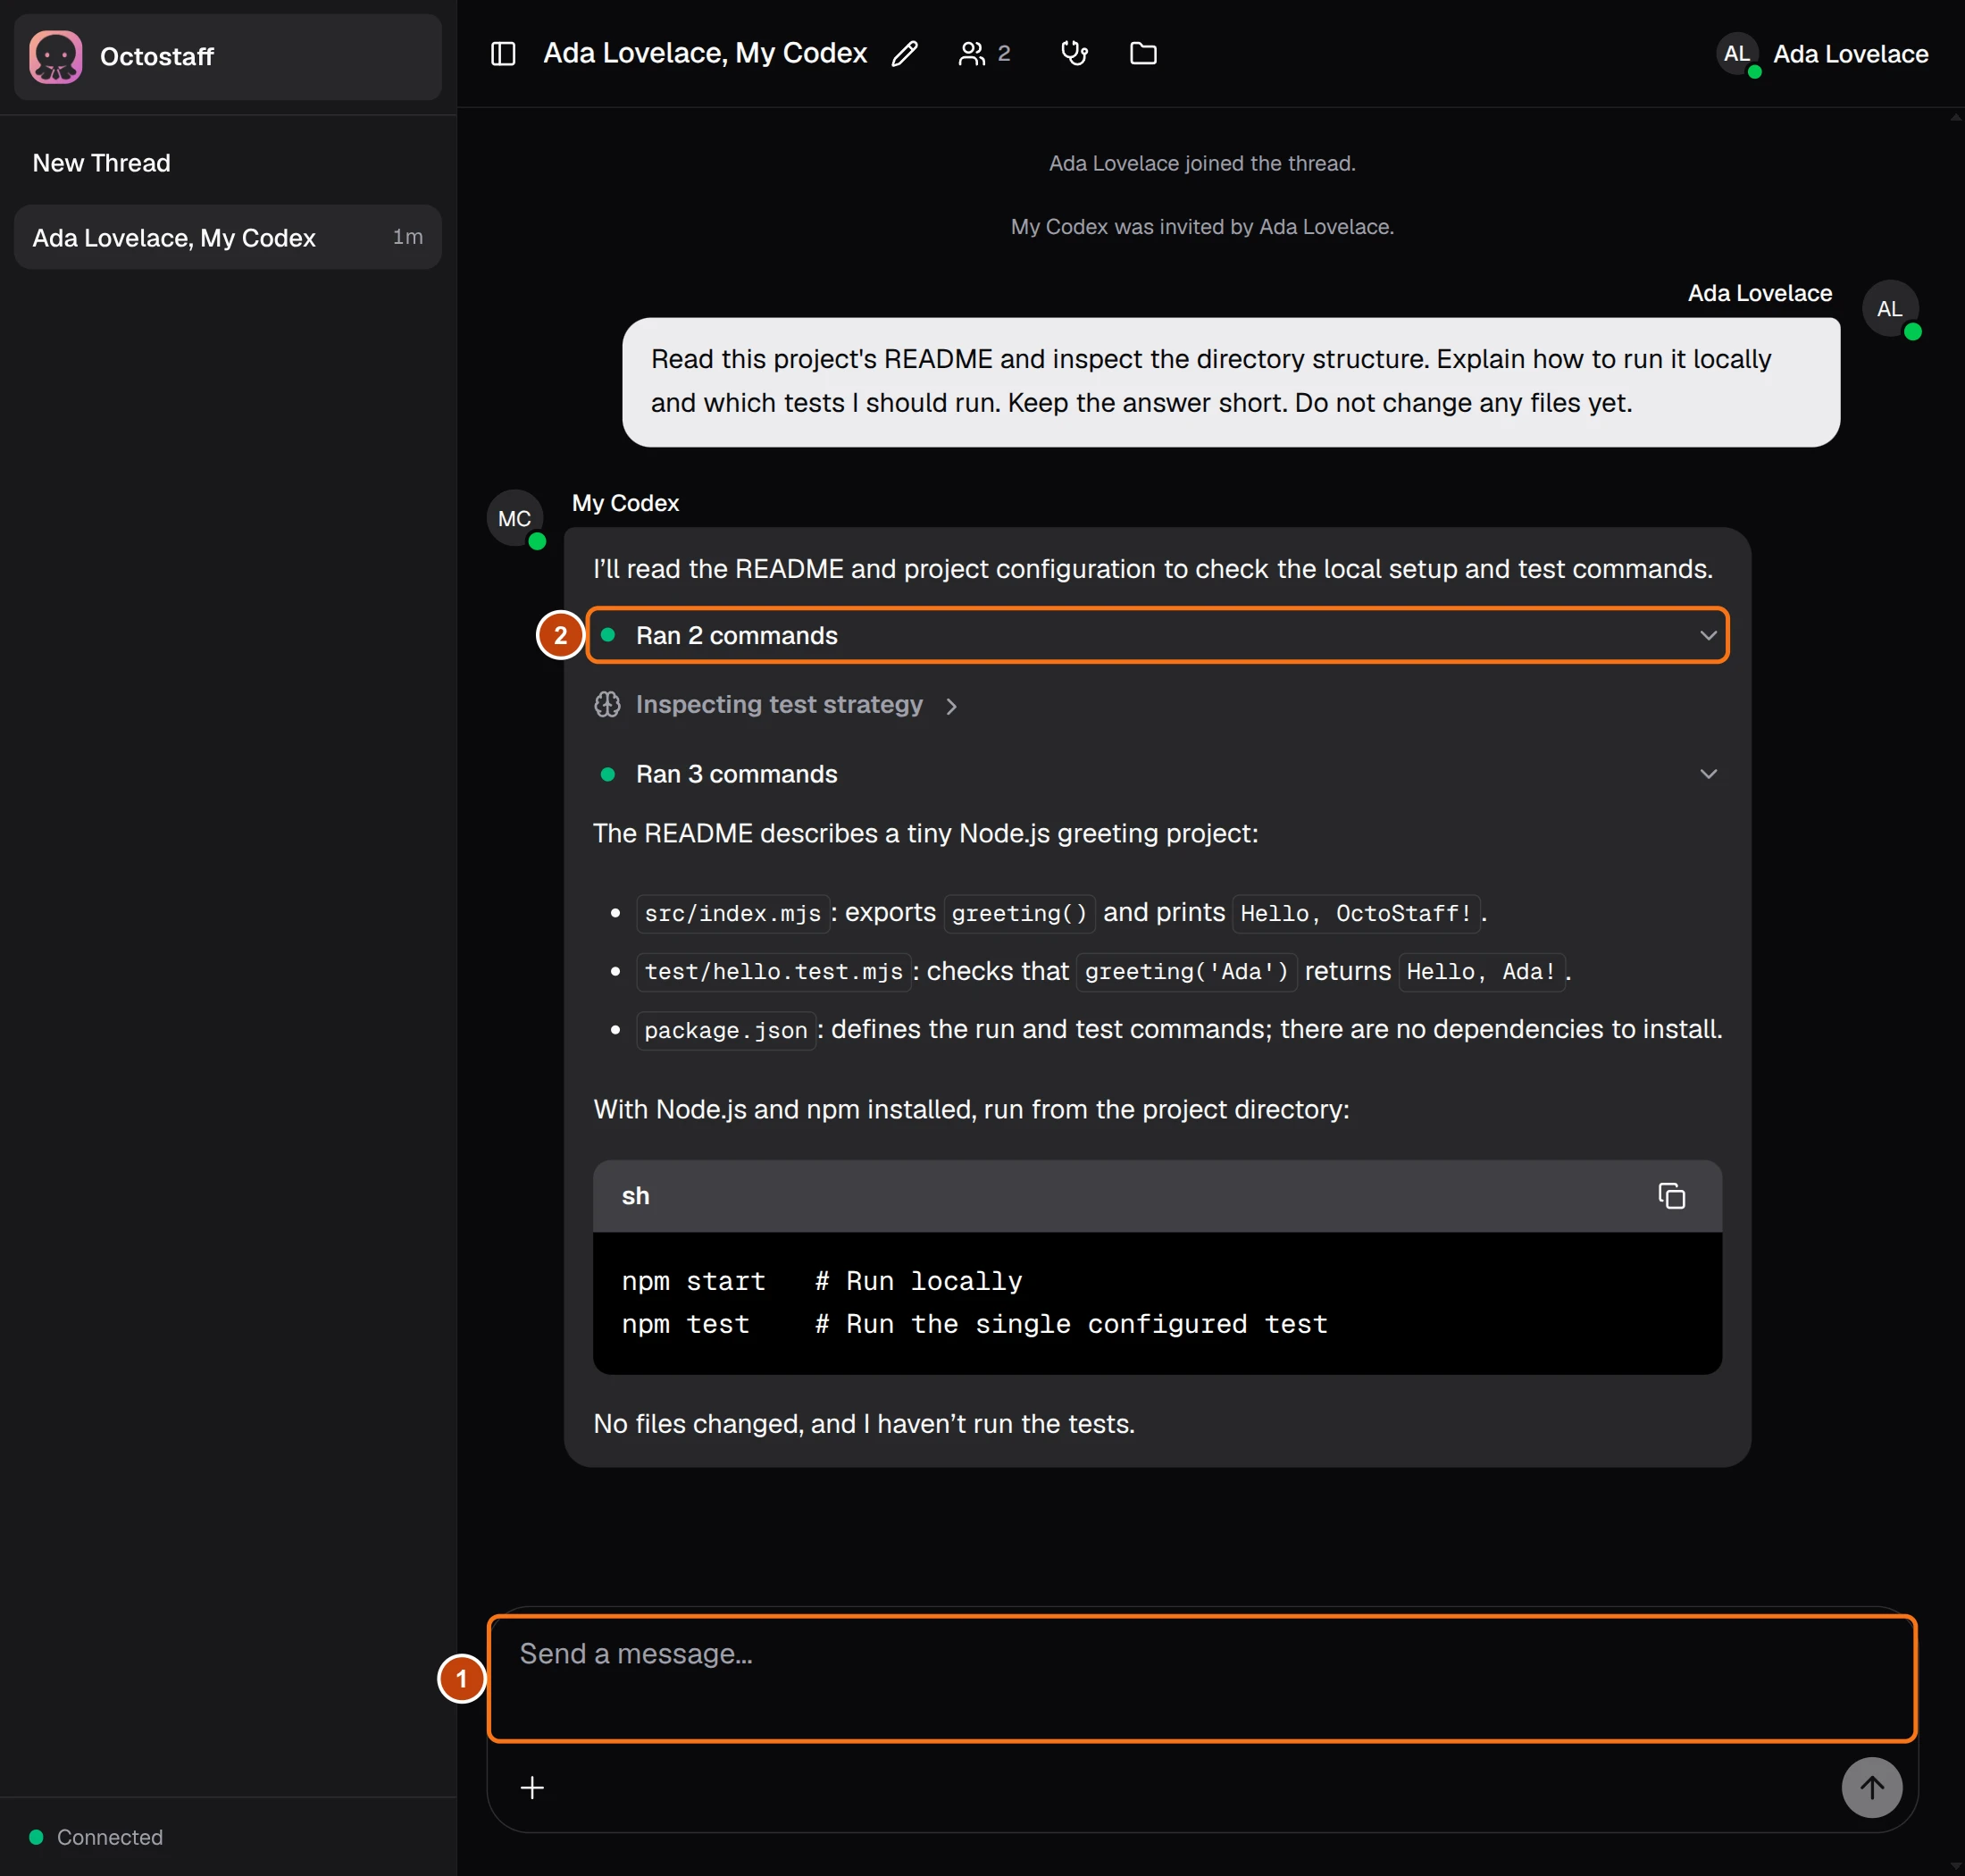
Type a task in the message box (1) and send it. Start with a request to read your project:
Read this project's README and
inspect the directory structure.
Explain how to run it locally
and which tests I should run.
Keep the answer short. Do not
change any files yet.
Watch the tool activity (2) and read Codex's reply.
Then ask it to make a change:
Add a setup section to README.md
using the commands you found.
Check the instructions against
package.json, then summarize
your changes.
Answer any approval or question cards to let Codex continue. Use Stop to
interrupt it, or send a follow-up message. Review the changes in your local
editor or with git diff.
For another conversation, choose New Thread and invite My Codex again.
To work in another project, send /cd /absolute/path/to/another/project in
the thread. The path must exist on the computer running the bot.
Customize Codex
Edit ~/.codex/config.toml to change Codex's model, reasoning effort, approvals,
or file access. Codex Scuba uses those settings. Keep the connection YAML above
small, and set Codex's behavior in its own configuration file.
For example, to let Codex edit project files and request approval when needed,
set these top-level options in ~/.codex/config.toml, before any [section]
headings:
sandbox_mode = "workspace-write"
approval_policy = "on-request"
Restart codex-scuba and open a new thread after changing these defaults.
For more settings and examples, see:
- OpenAI's Config basics.
- Trail of Bits' Codex setup guide for a third-party configuration example.
Troubleshooting
| Problem | Check |
|---|---|
| The bot does not reply | Keep codex-scuba running and invite My Codex into this thread. |
| The connection fails | Check the URL and token in ~/.bubble/codex-scuba/config.yaml. |
| Codex cannot use a model | Run codex login status on the bot's computer. |
| Codex reads the wrong project | Check --cwd, or send /cd with the correct full path. |
| Codex is waiting | Answer the approval or question card in the thread. |
Lost your bot token? Open Settings → Bots, expand the bot's Tokens, and choose Mint token. Update your YAML with the new token, restart the bot, and revoke the old token.
For advanced connector settings, see Running a Codex bot.